
My "new" bathroom has been so fun to see the MAJOR transformation for MINOR moo-la!
The main problem in the bathroom was the tile.
That, I thought was a HUGE problem and one we couldn't afford to change.
I was WRONG!!
I NEVER thought I could have clean, neutral tile in there...NEVER!

I LOVE the clean look. It is a very neutral color...which allows me to switch out towels
and color like I LOVE to do.

"Pink...Is Not My Favorite Color!" Sorry Aerosmith.

Here is a little more of the old puke, I mean pink bathroom.

Honestly, it is really sweet...I just needed a change.
Click HERE for more about this transformation.
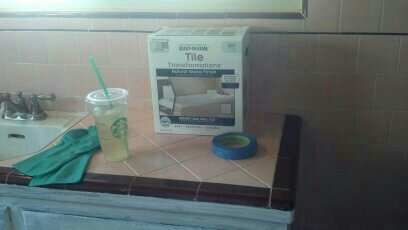
So, here is the kit I bought...Rustoleum Tile Transformation Kit.
$99 + tax = SO WORTH IT!!!!!
I REALLY did my research and read a ton of reviews on different products.
You can check out my Pinterest Board for the tips, tutorials and how-to videos I found helpful.

I finally decided to go with the Rustoleum kit. My sister has used the Rustoleum Cabinet Transformation kit and was very happy with it. So, I figured the tile kit would be good, too.
It was better than I thought!
Easier to use than I anticipated.
Not as stinky and fumy as I expected.
Not at all as expensive as the alternative of gutting it!
I am a happy girl.

The kit includes most everything you need...

on the back of the box you will see the few things you need: a mask, goggles, a roller...)
I read the directions a couple of times, and watched the youtube video as well (HERE.)
The first step is to clean your tile thoroughly.
DO IT!!
I cleaned it with the cleanser included and then cleaned the shower area again with
Comet, which as recommended. I allowed the tile to dry for about five hours.
The next step is to apply the Textured Bond Coat.
This is basically your base coat...you choose the tile color tint to be mixed in.

I chose "Biscuit," a very pretty, creamy bone-white color.
I love to decorate and figured this was a great color to allow me to switch up bathroom towels and bath mats every so often for fun!

The last step is to apply the Natural Stone Finish...you just roll this on over, not too thick!
Honestly, this was a SUPER EASY project. It really was not too bad.
A little elbow grease, some sweat and it was actually not tough at all!
I didn't think that the bathroom would look this good
or be really be transformed this much with just a $99 investment.
It does!
I just need to finish up some painting, get some new bathmats...and, I will have
ALL the "Before & Happily Ever Afters" for you Thursday!
Love & Junk~
Julie
MONDAY:
www.skiptomylou.org www.craftomaniac.blogspot.com
www.betweennapsontheporch.net
www.homestoriesatoz.com
www.uncommondesignsonline.com
www.alderberryhill.blogspot.com
www.cupcakesandcrinoline.com www.rainonatinroof.com
www.astrollthrulife.net
TUESDAY:
www.notjustahousewife.net
www.knickoftimeinteriors.blogspot.com
www.insidebrucrewlife.com www.diyshowoff.com
WEDNESDAY:
www.somedaycrafts.blogspot.com
www.lilluna.com www.highheelsandgrills.blogspot.com
www.gingersnapcrafts.com
www.creationsbykara.com
www.bec4-beyondthepicketfence.blogspot.com
www.the36thavenue.com www.cupcakesandcorndogs.com
THURSDAY:
www.livelaughrowe.com
www.somewhatsimple.com
www.impartinggrace.com
www.thevintagefarmhouse.com
www.thecsiproject.com
FRIDAY:
www.frenchcountrycottage.blogspot.com
www.tatertotsandjello.com
www.fivedaysfiveways.com
www.freckledlaundry.com
www.thestitchinmommy.blogspot.com
www.whipperberry.com www.commonground-do.comwww.sixsistersstuff.com
SATURDAY:
SUNDAY:
Uh-oh, guess you haven't seen this http://savethepinkbathrooms.com/
ReplyDeleteLove it! How's it holding up so far? I'm thinking of this product for my kitchen backsplash...
ReplyDelete